Showing posts with label Breakfast. Show all posts

May 31, 2014

Spinach Soufflé

What comes to mind when I think of soufflés are times I've been to a French restaurant and they tell you if you want the souffle for dessert, you'll have to allow 30 minutes for it to be prepared. So I've always been a little intimidated to make them. But after I made Light Strawberry Soufflés a few weeks ago and saw how easy they were, I decided to try to tackle a savory variation. Believe it or not, it's so easy that this is going to be my substitute for quiche when I don't have the luxury of time to whip up a crust.


2 cups chopped spinach or Swiss chard
3 T. butter
3 T. flour
1 cup milk
1/2 cup shredded sharp cheddar cheese
2 T. minced onion
1 t. salt
4 eggs, separated

Preheat oven to 375 degrees. 

Sauté spinach in a lightly-greased non-stick pan over medium heat until wilted, seasoning it with a few pinches of salt. If there's any liquid left in the pan or the spinach, press it out through a mesh strainer. Set aside.

Heat milk in a small saucepan over low heat to warm it through but not bring it to a boil. 

Melt butter in a medium saucepan over medium heat. When melted, whisk in flour, removing any lumps, until it forms a paste. Gradually add warm milk, stirring constantly, until it forms a smooth, thick roux. 

Reduce heat to low and stir in cheese, onion, spinach and salt to the roux. Allow cheese to melt while you prepare your eggs.

Whisk egg yolks by hand in a large bowl. In a separate bowl, beat egg whites just until stiff peaks form.

Slowly mix your roux to the beaten egg yolks. Once incorporated, gently fold in whipped egg whites. 

Pour mixture into a greased 1.5 - 1.75 quart casserole dish with straight sides. 

Bake at 375 degrees for 30-35 minutes, until the top is browned and it doesn't jiggle like Jello when you shake it.

Serve immediately. Soufflé will deflate the longer it's out of the oven. 

BEVERAGE NOTE: Whether it's breakfast or dinner, you can't go wrong with a Mimosa!

May 16, 2014

Aunt Susie's Egg and Brie Toast

When I went to visit my Aunt Susie over Easter, she made this for breakfast and I fell in love with it. It's so easy that you could whip it up on a weekday morning and start your work day like it's a day off!


This recipe is for one, but just double, tripple, etc., depending on how many you're serving. Use a double-burner griddle and cook them all at once.

1 slice of bread
1 T. butter
1 egg
1-2 slices of brie cheese
1/2 t. fresh thyme, chopped

Heat a griddle pan over medium-low heat. 

Butter both slides of the bread and toast on the warmed griddle. 

Spray the griddle on the other side with non-stick spray and fry your egg, sprinkling it with a pinch of salt. 

Flip bread once toasted and top the toasted side with brie. Flip egg once white has solidified. Once egg is cooked to your desired firmness, place it on top of cheese while bread continues to toast on the second side.

Sprinkle tyhme on top and season with salt or pepper as desired. Serve with fresh fruit or a light salad to make it brunch or dinner appropriate.

May 14, 2014

Fiesta Omelette

It's like a cheese enchilada for breakfast! This is also the easiest way I've found to make an omelette -- by putting all the fillings on the outside. It tastes just as good!


3 eggs
3 T. milk
1/4 t. salt
1/4 cup shredded cheddar or Mexican blend cheese
1/4 cup salsa
1/2 avocado
dollop of sour cream, yogurt or creme fraiche

Heat an 8" non-stick skillet over medium-low heat. Hit it with some non-stick cooking spray. 

Whisk eggs, milk and salt. Pour into pan once warm. Allow to cook until you can see that it has gotten firm on the bottom, but is still slightly liquid on top.

Sprinkle cheese evenly on top of egg mixture and allow to melt for 1 minute. 

Gently fold each side of the egg mixture into the center, like folding a burrito. Cook for one minute more, then gently flip upside down. Cook for 2-3 minutes more, until eggs are cooked through.  

Slide from pan to plate and top with salsa, avocado and sour cream. Serve with a side of tortilla chips.


March 13, 2014

Chocolate, Banana and Peanut Butter Shake

This shake is so thick and creamy, you won't notice that there is no ice cream in it! Freezing the banana makes a good substitute for ice cream, the peanut butter gives it extra thickness and chocolate soy milk gives it a silky quality. It makes an equally good breakfast as dessert!


This is also a great way to use bananas that are getting too ripe. Just slice them, lay them out on a plate and put them in the freezer. Once frozen, move the banana slices to a freezer bag and then use them in this shake or other fruit smoothies as needed. 

You will need a blender that can crush ice.

1 banana, sliced and frozen
2 T. peanut butter
1 cup chocolate soy milk

Place frozen bnana slices in the blender. I try to let them sit at room temperature for a few minutes to get the frost off before I turn the blender on. I think this reduces the chance that you'll get a frozen chunk of banana in your shake. 

Add peanut butter and soy milk. Turn blender on high or ice-crushing setting for 20 secnds or until smooth.

March 2, 2014

Sausage Gravy with Biscuits and Poached Eggs

Biscuits and Gravy is my favorite item on the breakfast menu!


When I moved South, my husband's Aunt Frances showed me how to make sausage gravy, and this is her recipe. She was born in Appalachian East Tennessee during the Great Depression.They lived off the land, raising hogs and slaughtering them each fall. To preserve the meat through the winter, they would smoke some and turn some into sausage that they packed into jars and kept in the outdoor cold cellar.

As I watched her make sausage gravy, she told me that back then, their sausage had more fat in it. What you buy in the grocery store today is quite lean in comparison. She's had to modify her recipe over the years to include bacon grease as a replacement. (You do save your bacon drippings, right?)

Frances makes a brown gravy, which means she lets the flour in (what I would call) her roux brown before adding the milk. This will give it more flavor. I make mine a little less brown because I get impatient and I like my gravy and biscuits to be done at the same time. You can adjust to fit your taste.

Serve your gravy any way you like, but I take mine with a biscuit and a poached egg. If you want to serve bacon or sausage patties as well, cook those first and reserve the grease. Start your gravy in the same skillet.

Serves 4-6

First I make up my biscuits using White Lily self-rising flour and the recipe on the back of the bag. I cook mine in a 10-inch cast iron skillet with 4 T. of butter melted in the bottom and brushed on top. Once I put them in the oven to cook (for 25-30 minutes), I start the gravy.

1/2 lb. ground breakfast sausage
1/2 t. salt
1/2 t. sugar
1/4 t. ground black pepper
1-2 T. bacon grease
1/2 cup flour
3 cups milk

In a large, cast-iron or deep non-stick skillet, brown your sausage over medium heat. Add salt, sugar and pepper and stir in. Add flour and stir to coat the sausage. If there's not enough grease in the pan to absorb all the flour, add 1/2 T. of bacon grease at a time until you see no more raw white flour. 

For a more brown (and flavorful) gravy, continue cooking sausage for 10 more minutes to brown the flour in the hot grease. Once it has reached your desired brownness, add milk 1/2 cup at a time and stir until a paste forms. Then add more milk until you've used all 3 cups. It may seem thin enough without all the milk, but trust me, it will continue to thicken!

While gravy is thickening, poach your eggs in boiling water (3 minutes for light, 4 for medium, and 5 for hard). Layer biscuit, egg, gravy, then enjoy.


February 28, 2014

Zucchini and Swiss Frittata

I love omelettes, but can never seem to make them successfully at home. Instead, I've started making frittatas! Same ingredients but no flipping required. Just cook your meat and/or veggies in a oven-safe skillet, add your eggs and cheese and pop it in the oven to cook. This recipe serves 2, but you can adjust the ingredients and cooking time to feed a bigger crowd. As always, use whatever veggies, herbs and cheese you have on hand. This is a guideline!


1 T. olive oil
1/2 medium onion, sliced
1/2 medium zucchini, sliced
1/2 medium yellow squash, sliced
1/2 t. thyme, chopped
salt and pepper to taste
4 large eggs
1/2 cup milk
1/2 cup shredded Swiss cheese
1/4 t. salt

Preheat oven to 350 degrees. 

Heat oil in a large oven-safe non-stick skillet over medium heat. Add onion, zucchini, squash and thyme. Sauté until tender but not mushy, about 10 minutes. 

Whisk eggs and milk and add salt. Once veggies are cooked, be sure they are spread evenly in the bottom of the skillet and pour egg mixture on top. Sprinkle cheese on top. Don't stir! Cook for a few minutes in the skillet to help the frittata solidify on the bottom. 

Pop the skillet in the oven and bake for 15-20 minutes, or until cheese begins to brown and the eggs feel firm. Remove from oven and let frittata set for about 5 minutes.

Cut frittata in half. Flip each half in half and serve.

January 24, 2014

Fried Potato Patties

Leftover mashed potatoes can be transformed into a new side dish for the next day's breakfast or dinner. Or you can make them up and freeze them for weeks later.


Leftover mashed white or sweet potatoes
Flour
Salt and pepper
Cooking oil or reserved bacon grease

I like these for breakfast with bacon and a poached egg, so I start by cooking my bacon so I can reserve some of the grease to cook my potato patties. Heat either bacon grease or cooking oil in a cast iron or non-stick skillet over medium heat. Since the potates are already cooked, you just need enough grease to form a crust on the outside of your patties.

Form mashed potatoes into patties with your hands. Combine enough flour, salt and pepper to coat the number of patties you made. For 1/4 cup of flour, add 1/4 t. salt and pepper to taste. Coat potato patties in flour on all sides, brushing off the excess. If you are freezing your patties for later, wrap them in plastic wrap and then place them in a freezer bag.

Add coated patties to your hot pan and cook for 5 minutes on each side, flipping only once to minimize the chances of them getting smooshed or breaking apart. Serve hot.

January 8, 2014

Quiche du Jour

Quiche is one of those recipes, like pizza, that you can make different every time based on what you have on hand. And it's great for breakfast, lunch or dinner! The pie crust is the most time-intensive part, but if you make extras and put them in the freezer for later, it makes for light work next time, or a quick dessert.


Use any pie crust recipe you like, or make it gluten free with a shredded potato crust, which is also very good. Here's a basic pie crust recipe.

Pastry pie crust
(Makes two 10-inch crusts with room for crimping or three 8-inch crusts)
2 cups all purpose flour
1 tsp. salt
1 cup shortening, cut into cubes
1/2 cup cold water

Combine flour and salt. Add shortening and cut into flour with a pastry knife. Add water and mix until combined. Separate dough into two (or three) balls and roll each out on a flowered surface. Transfer to your pie plate and press to an even shape, crimping edges if desired. Prick the bottom of the crust with a fork multiple times and put in the refrigerator for at least 30 minutes to get cold. This will help your crust keep its shape while baking. 

For quiche, I parbake the crust before adding the filling. Preheat oven to 400 degrees and bake crust for 10 minutes or unitil no longer raw dough, but not so long that the edges begin to brown. Let crust cool slightly before adding fillings.

To freeze extra pie crusts, press them out in pie plates and cover tightly with plastic wrap. If you make multiple crusts, you can stack them. Place crust(s) in a ziplock bag and freeze for up to 6 months.

Quiche
(For one 10-inch quiche)
5 large eggs
3/4 cup milk (or mix of milk and cream)
1/2 tsp. salt
pinch of grated nutmeg
black pepper or red pepper flakes, depending on how spicy you like it
1/2 cup shredded cheese of your choice, and more for topping (if desired)
1-1 1/2 cups cooked fillings of your choice

Preheat oven to 400 degrees. Cook any meet or saute any raw vegetables that you're planning on using in your filling. (See suggestions below.) Season with salt and pepper as desired and let cool slightly. Whisk eggs, milk, salt, nutmeg and pepper. Add cheese to egg mixture.

Spread cooked fillings (excluding any excess fat or liquid) on the bottom of parbaked pie crust. Pour egg and cheese mixture on top. Top with additional cheese, if desired. (I sometimes like to sprinkle Parmesan or place dolops of soft goat cheese on top.) Bake for 30 minutes or until eggs are cooked through. Use a pie shield if edges of pie crust brown too quickly. Allow to cool for 5-10 minutes before cutting and serving.

Filling suggestions:
1 small onion, sliced
1-2 cloves of garlic, minced
1/2 cup mushrooms, sliced
1-2 cups fresh spinach or other greens
1/2 cup chopped sweet pepper
1-2 T. chopped hot pepper
1 medium zucchini, cubed
1/4 cup sun-dried tomatoes, sliced
1 cup chopped broccoli
1/2 lb. ground sausage
3-4 slices of bacon
1/2 cup diced ham 
1/2 cup shredded chicken
1 tsp. dried herbs or 1-2 T. fresh herbs (thyme, parsley, oregano, basil, marjoram, chives, dill, etc.)


June 22, 2011

Swiss Meusli Cereal

I'd been making homemade granola all winter and spring until I went home to Pennsylvania over Memorial Day weekend and discovered Swiss Meusli at the Amish Market. It's the same base of grains, nuts and fruits, minus all the sugar and fat of granola. And it's no bake, which saves your AC from working overtime, and takes half the time to make!

I like to make up a batch of this cereal that I can store in a quart sized Mason jar and use all week long. Then each day add some of your favorite fresh fruit and milk, and you've got one amazing, healthy start to the day!

You can either prepare your daily muesli that morning, or spend a few extra minutes the night before to let your grains soak up all the milk and turn into more of a cold porridge.

Dry Ingredients
2 1/2 cups thick cut rolled oats
1/4 cup unsalted sunflower or pumpkin seeds
1/4 cup sliced almonds, or other nuts, chopped
2 T. brown flax seeds
1/2 cup shredded coconut, lightly toasted
1/4 cup raisins
1/4 cup cranberry raisins or other dried fruit (dates, pineapple, apricots, etc.)


Instructions
Add coconut to a pan over medium heat. Let it sit undisturbed until tips begin to turn light brown. Stir for a few minutes to keep coconut from getting toasted much further, then remove from heat and set aside. Combine coconut with all other ingredients except brown sugar in a large bowl and toss to combine. Transfer to an air-tight container and store for up to several weeks.

To serve

If you want to make it up the night before, here's the process I learned from my local German restaurant who serves muesli on their menu. The below quantities serves 2, but can be easily adjusted for one or more.

1 large ripe banana, mashed
1/2 T. honey
1/4 t. Cinnamon
3/4 c. Milk
1 c. Dry muesli cereal

Mix all ingredients in the order listed and let sit in a sealed container for at least three hours or overnight in the refrigerator. Top with your favorite fresh fruit (apples, peaches, berries, etc.).


If you don't make it up the night before, add the desired amount of milk or yogurt, fresh fruit, sweetener and cinnamon and serve immediately. Or you can heat your milk and pour it over your dry muesli cereal for a hot breakfast, adding your desired fruit, sweetener and cinnamon.

February 20, 2011

The Big Pancrêpe

It's the easiest, most gourmet breakfast pastry you will ever make! To me, the pancrêpe is the perfect combination between a light, delicate crêpe, and a big, filling stack of pancakes. If you've never made a pancake or a crêpe, no worries. Because it doesn't need to be flipped, the pancrêpe is stupidly simple! Forget the syrup, but garnish this puppy with a little lemon juice, powdered sugar and whatever fruit you have on hand. Why go out for brunch when you can make one of these at home? 


Suggested kitchen gadgets

  • Large non-stick skillet
  • Sifter


Ingredients


  • 3 T. butter
  • 2 eggs
  • 1/2 cup flour
  • 1/2 cup milk
  • 1 t. sugar
  • 1/4 t. salt
  • Pinch of ground nutmeg
  • Fresh lemon juice
  • Powdered sugar
  • Fruit of your choice


Instructions


Preheat oven to 425 degrees. Put the butter in a 9 to 10-inch nonstick skillet or pie plate. Place in the heating oven and remove once the butter is melted. (If your skillet has a plastic handle, you can cover it with tin foil to protect it. Even if you have an oven-safe skillet, be sure to use a heavy-duty pot holder to remove it from the oven.)


In a medium-sized bowl, whisk the eggs and mix in the milk, flour, sugar, salt and nutmeg until the mixture is smooth. Pour the batter into the hot skillet with the melted butter and put it back in the oven for 15 minutes or until the pancrêpe is puffy and browned on the outside. 
Remove from the oven a slide your pancrêpe onto a plate. Squeeze a half lemon over the pancrêpe to lightly sprinkle it with lemon juice. Cut it in half and move half to another plate. Top each with fruit (fresh, thawed fruit from the freezer, or even canned fruit.) Sift powdered sugar over the top and serve immediately.


Topping suggestions

  • Fresh strawberries and whipped cream
  • Mixed berries (blueberries, raspberries, etc.) and a dollop of vanilla yogurt
  • Peach slices and toasted pecans pieces

The pancrêpe itself is harldy sweet, so I think savory toppings would also be a good variation, like a big open, faced savory crêpe. Experiment and let me know!


January 8, 2011

Chocolate Muffins

Chocolate muffins -- are they a breakfast treat or dessert? It's up to you... these could be either! The basics for this recipe are ingredients you probably keep on hand. Then change it up depending on the occasion. Add dried fruit and nuts for a healthier version. Add candy and other confections to make them really decadent!

Essential Kitchen Gadgets

  • Mixer (stand, hand or the old-fashioned non-electric beaters)
  • Muffin pan
Basic Ingredients
  • 1 1/2 cups all purpose flour
  • 1/2 cup unsweetened cocoa powder
  • 1 Tbsp baking soda
  • 1/8 tsp salt
  • 1 cup sugar
  • 2 large eggs
  • 1 cup milk
  • 6 Tbsp canola oil
  • 1 cup of your choice of dry goodies
Today I used chopped up Hershey's candies and raisins. Here are some other suggestions, but use anything that sounds good to you:

  • dried cherries and white chocolate chips
  • butterscotch chips and mini marshmallows
  • dehydrated banana pieces and chopped peanuts
Instructions
Mix flour, cocoa powder, baking soda and salt. If you have a sifter, sift these ingredients together for a smoother batter. Whisk in sugar and set aside.

In mixing bowl, beat eggs on low and add milk and oil. Gradually add in dry ingredients. Once mixed, stir in your dry goodies.

Grease a 12-muffin tray (with or without muffin papers). Use an ice cream scoop to fill muffin cups with batter just shy of the top. Bake for 20 minutes in preheated 400 degree oven, or until a toothpick inserted comes out clean.

Remove muffins from tray and let cool on a wire rack. Once cool, store in an air-tight container until ready to serve.

Serving
All you need to eat this is a napkin to catch the crumbs. Makes them great as breakfast on the go or for taking to a picnic, office party, or to the home of a friend who invites you over for dinner!

January 3, 2011

Fruit Smoothies

It's the healthy milkshake... frozen, creamy, and a great way to get in a full day's serving of fruit and calcium before you even leave the house!

Essential kitchen gadgets
  • Blender that will chop ice

Basic ingredients
  • Banana -- The banana gives you thickness and a more milkshake-like texture. I suggest using one that has already started to get some brown spots because it will also add sweetness. If you don't like the taste of bananas, you may not even notice the flavor depending on the other ingredients you add. But you can forego the banana if you are allergic or really don't like the flavor.
  • Yogurt or cultured milk -- Adjust the amount to give you the level of creaminess you desire. I use plain yogurt or cultured milk because I like the tanginess it provides in contrast to the sweetness of the fruit. But you can use vanilla yogurt or another sweetened fruit flavor that compliments your other ingredients.
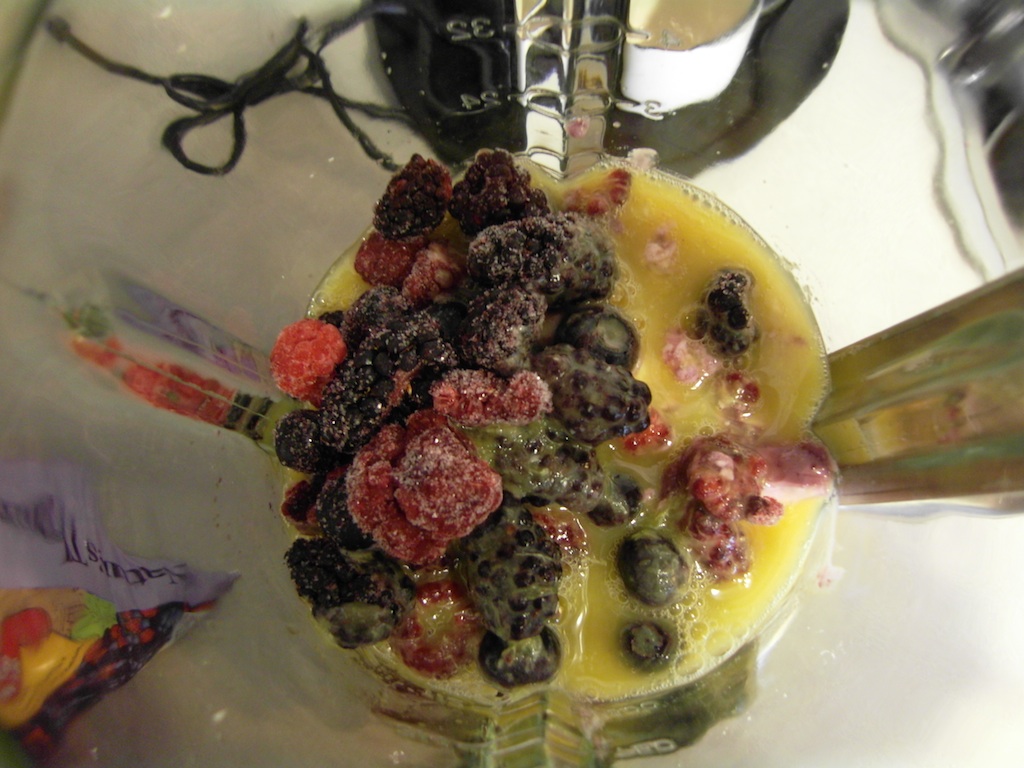
  • Frozen fruit -- The possibilities are endless! My favorites are peaches, mangoes and any kind of berry. This is often the most pricey ingredient in your smoothie. To reduce the cost, either buy in bulk at a place like Costco, OR, if you have the patience, buy fruit and berries you like when they are in season and freeze them yourself. If you do the latter, be sure to wash them and then place them (not touching) on a baking sheet in the freezer until frozen. Then throw them in a freezer bag until you're ready to use.
  • Juice -- This is what makes it possible to drink your smoothie. You'll need enough liquid for your blender to combine all the ingredients, but you can add more to make it thinner. I use orange juice (fortified with calcium) most often because it's sweet and I always have it on hand. Other good choices are pineapple juice or any kind of fruit nectar.
  • Sweetener -- I don't ever use an additional sweetener, but you certainly could if you're using ingredients that aren't as naturally sweet as you'd like your smoothie. I would use honey because it will blend in well.


Instructions
Combine one banana, ~1/2 cup yogurt or cultured milk, ~1 cup of frozen fruit, ~1/2 cup juice and any sweetener you may add. Blend on a setting that will chop ice for 20 to 30 seconds, or until desired consistency.

Serving
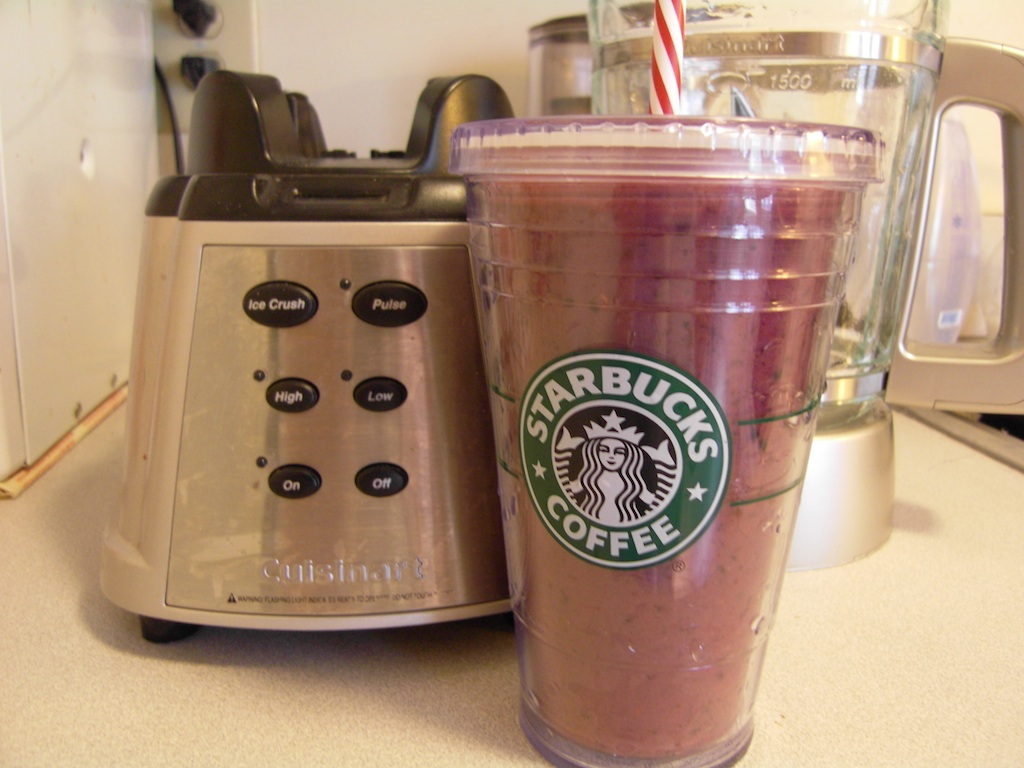
If you make these often, get a re-usable, insulated "to-go" cup with a straw, like this one I got from Starbucks. It will keep your smoothie cold for at least an hour. Great way to take it with you as you embark on your day!